Afficher/cacher Sommaire
debian-10-cx21
![]()
![]()
PARAMETRES D’ACCES:
L’adresse IPv4 du VPS est : 95.216.222.127
L’adresse IPv6 du VPS est : 2a01:4f9:c010:45b3::/64
Hostname : debian-4gb-hel1-1
Le nom du VPS est : debian-10-cx21
La clé publique debian-10-cx21.pub est transmise au gestionnaire pour la construction du serveur
Connexion SSH en “root” avec clés SSH debian-10-cx21 sans mot de passe
ssh -i .ssh/debian-10-cx21 root@95.216.222.127
Créer mot de passe “root”
passwd
Réseau
1: lo: <LOOPBACK,UP,LOWER_UP> mtu 65536 qdisc noqueue state UNKNOWN group default qlen 1000
    link/loopback 00:00:00:00:00:00 brd 00:00:00:00:00:00
    inet 127.0.0.1/8 scope host lo
       valid_lft forever preferred_lft forever
    inet6 ::1/128 scope host
       valid_lft forever preferred_lft forever
2: eth0: <BROADCAST,MULTICAST,UP,LOWER_UP> mtu 1500 qdisc pfifo_fast state UP group default qlen 1000
    link/ether 96:00:00:80:22:12 brd ff:ff:ff:ff:ff:ff
    inet 95.216.222.127/32 brd 95.216.222.127 scope global dynamic eth0
       valid_lft 85731sec preferred_lft 85731sec
    inet6 2a01:4f9:c010:45b3::2255/64 scope global
       valid_lft forever preferred_lft forever
    inet6 fe80::9400:ff:fe80:2212/64 scope link
       valid_lft forever preferred_lft forever
Noyau et OS : uname -a
Linux debian-4gb-hel1-1 4.19.0-12-amd64 #1 SMP Debian 4.19.152-1 (2020-10-18) x86_64 GNU/Linux
Paramétrage fuseau Europe/Paris : dpkg-reconfigure tzdata
Current default time zone: 'Europe/Paris'
Local time is now:      Sun Nov 22 08:06:42 CET 2020.
Universal Time is now:  Sun Nov 22 07:06:42 UTC 2020.
Vérifier l’heure
timedatectl status
               Local time: Sun 2020-11-22 08:45:34 CET
           Universal time: Sun 2020-11-22 07:45:34 UTC
                 RTC time: Sun 2020-11-22 07:45:35
                Time zone: Europe/Paris (CET, +0100)
System clock synchronized: yes
              NTP service: active
          RTC in local TZ: no
Hostname
hostnamectl
   Static hostname: debian-4gb-hel1-1
         Icon name: computer-vm
           Chassis: vm
        Machine ID: 5e93c746b78b49c5a61470c448d04423
           Boot ID: 513fff3bb1db43a392217d19105e2c2d
    Virtualization: kvm
  Operating System: Debian GNU/Linux 10 (buster)
            Kernel: Linux 4.19.0-12-amd64
      Architecture: x86-64
Locales reconfiguration pour le français par défaut
dpkg-reconfigure locales
[*] en_US.UTF-8 UTF-8
[*] fr_FR.UTF-8 UTF-8
Yunohost
![]()
Installation
Une fois que vous avez accès à votre serveur (directement ou par SSH)
vous pouvez installer YunoHost en exécutant cette commande en tant que root :
apt update && apt upgrade
apt install curl
curl https://install.yunohost.org | bash
[...]
[ OK ] YunoHost installation completed !
===============================================================================
You should now proceed with Yunohost post-installation. This is where you will
be asked for :
  - the main domain of your server ;
  - the administration password.

You can perform this step :
  - from the command line, by running 'yunohost tools postinstall' as root
  - or from your web browser, by accessing :
    - https://95.216.222.127/ (global IP, if you're on a VPS)

If this is your first time with YunoHost, it is strongly recommended to take
time to read the administator documentation and in particular the sections
'Finalizing your setup' and 'Getting to know YunoHost'. It is available at
the following URL : https://yunohost.org/admindoc
===============================================================================
Post-installation (yanfi.space)
yunohost tools postinstall
Main domain: yanfi.space
[...]
Warning: The ssh configuration has been manually modified, but you need to explicitly specify category 'ssh' with --force to actually apply the changes.
Success! YunoHost is now configured
Warning: The post-install completed! To finalize your setup, please consider:
    - adding a first user through the 'Users' section of the webadmin (or 'yunohost user create <username>' in command-line);
    - diagnose potential issues through the 'Diagnosis' section of the webadmin (or 'yunohost diagnosis run' in command-line);
    - reading the 'Finalizing your setup' and 'Getting to know Yunohost' parts in the admin documentation: https://yunohost.org/admindoc.
Le mot de passe root remplacé par celui de l’admin yunohost
SSH (admin)

Autoriser admin à se connecter SSH
mkdir  /home/admin/.ssh
cp /root/.ssh/authorized_keys /home/admin/.ssh/
chown admin.1007 -R /home/admin/.ssh
Modification SSH pour être conforme à l’installation yunohost mise à part l’utilisation d’un fichier clé qui n’est pas pris en compte dans la gestion SSH Yunohost
sudo nano /etc/ssh/sshd_config
# This configuration has been automatically generated
# by YunoHost

Protocol 2
Port 55127

ListenAddress ::
ListenAddress 0.0.0.0


HostKey /etc/ssh/ssh_host_ecdsa_key
HostKey /etc/ssh/ssh_host_ed25519_key
HostKey /etc/ssh/ssh_host_rsa_key

# ##############################################
# Stuff recommended by Mozilla "modern" compat'
# https://infosec.mozilla.org/guidelines/openssh
# ##############################################


  # By default use "modern" Mozilla configuration
  # Keys, ciphers and MACS
  KexAlgorithms curve25519-sha256@libssh.org,ecdh-sha2-nistp521,ecdh-sha2-nistp384,ecdh-sha2-nistp256,diffie-hellman-group-exchange-sha256
  Ciphers chacha20-poly1305@openssh.com,aes256-gcm@openssh.com,aes128-gcm@openssh.com,aes256-ctr,aes192-ctr,aes128-ctr
  MACs hmac-sha2-512-etm@openssh.com,hmac-sha2-256-etm@openssh.com,umac-128-etm@openssh.com,hmac-sha2-512,hmac-sha2-256,umac-128@openssh.com


# LogLevel VERBOSE logs user's key fingerprint on login.
# Needed to have a clear audit track of which key was using to log in.
SyslogFacility AUTH
LogLevel VERBOSE

# #######################
# Authentication settings
# #######################

# Comment from Mozilla about the motivation behind disabling root login
#
# Root login is not allowed for auditing reasons. This is because it's difficult to track which process belongs to which root user:
#
# On Linux, user sessions are tracking using a kernel-side session id, however, this session id is not recorded by OpenSSH.
# Additionally, only tools such as systemd and auditd record the process session id.
# On other OSes, the user session id is not necessarily recorded at all kernel-side.
# Using regular users in combination with /bin/su or /usr/bin/sudo ensure a clear audit track.

LoginGraceTime 120
PermitRootLogin no
StrictModes yes
PubkeyAuthentication yes
PermitEmptyPasswords no
ChallengeResponseAuthentication no
UsePAM yes

# Change to no to disable tunnelled clear text passwords
# (i.e. everybody will need to authenticate using ssh keys)
PasswordAuthentication no

# Post-login stuff
Banner /etc/issue.net
PrintMotd no
PrintLastLog yes
ClientAliveInterval 60
AcceptEnv LANG LC_*

# Disallow user without ssh or sftp permissions
AllowGroups ssh.main sftp.main ssh.app sftp.app admins root

# Allow users to create tunnels or forwarding
AllowTcpForwarding yes
AllowStreamLocalForwarding yes
PermitTunnel yes
PermitUserRC yes

# SFTP stuff
Subsystem sftp internal-sftp

# Apply following instructions to user with sftp perm only
Match Group sftp.main,!ssh.main
    ForceCommand internal-sftp
    # We can't restrict to /home/%u because the chroot base must be owned by root
    # So we chroot only on /home
    # See https://serverfault.com/questions/584986/bad-ownership-or-modes-for-chroot-directory-component
    ChrootDirectory /home
    # Forbid SFTP users from using their account SSH as a VPN (even if SSH login is disabled)
    AllowTcpForwarding no
    AllowStreamLocalForwarding no
    PermitTunnel no
    # Disable .ssh/rc, which could be edited (e.g. from Nextcloud or whatever) by users to execute arbitrary commands even if SSH login is disabled
    PermitUserRC no

Match Group sftp.app,!ssh.app
    ForceCommand internal-sftp
    ChrootDirectory %h
    AllowTcpForwarding no
    AllowStreamLocalForwarding no
    PermitTunnel no
    PermitUserRC no
    PasswordAuthentication yes

# root login is allowed on local networks
# It's meant to be a backup solution in case LDAP is down and
# user admin can't be used...
# If the server is a VPS, it's expected that the owner of the
# server has access to a web console through which to log in.
Match Address 192.168.0.0/16,10.0.0.0/8,172.16.0.0/12,169.254.0.0/16,fe80::/10,fd00::/8
    PermitRootLogin yes
Relancer openSSH
systemctl restart sshd
Ouvrir le port 55127 et fermer le port 22
yunohost firewall allow TCP 55127
yunohost firewall disallow TCP 22
Accès utilisateur depuis le poste distant avec la clé privée
ssh admin@95.216.222.127 -p 55127 -i /home/yannick/.ssh/debian-10-cx21
Installer utilitaires
sudo apt install rsync curl tmux jq figlet git dnsutils tree -y
Motd
sudo rm /etc/motd && sudo nano /etc/motd
                                ___  _
  ___  ___  ___  ___   __ __ __|_  )/ |  ___  ___  ___  ___
 |___||___||___||___| / _|\ \ / / / | | |___||___||___||___|
                      \__|/_\_\/___||_|
    _  _  __ _  _ _   / _|(_)    ___ _ __  __ _  __  ___
   | || |/ _` || ' \ |  _|| | _ (_-<| '_ \/ _` |/ _|/ -_)
    \_, |\__,_||_||_||_| _|_|(_)/__/| .__/\__,_|\__|\___|
    |__/ _  __ _  _ _   / _|(_)    _|_|  ___ | |_
     | || |/ _` || ' \ |  _|| | _ | ' \ / -_)|  _|
      \_, |\__,_||_||_||_|  |_|(_)|_||_|\___| \__|
      |__/(_) _ _   __ _  _  _     ___  _  _
      / _|| || ' \ / _` || || | _ / -_)| || |
      \__||_||_||_|\__,_| \_, |(_)\___| \_,_|
                          |__/
Autoriser utilisateur à accéder aux journaux systemd
sudo usermod -a -G systemd-journal $USER
SSH - Alerte par messagerie
alerte email quand une connexion ssh est réussie
Attention: selon les commentaires, cela ne fonctionnera pas si l’utilisateur crée un fichier nommé ~/.ssh/rc
Modifier ou créer /etc/ssh/sshrc avec le contenu suivant:
DESTINATAIRE="vps@ciany.eu"
VPHOST=$(hostname -f)
DATE=$(date "+%d.%m.%Y--%Hh%Mm")
IP=$(echo $SSH_CONNECTION | awk '{print $1}')
#IP=`echo $SSH_CONNECTION | cut -d " " -f 1`
LOCALISATION=$(curl -s ipinfo.io/"$IP" | jq -r '[.country, .city] | join(", ")')
REVERSE=$(dig -x $IP +short)
echo "Connexion de ${USER} sur $VPHOST

IP de connexion: ${IP}
Localisation appelant: ${LOCALISATION}
ReverseDNS: ${REVERSE}
Date: ${DATE}
" | mail -s "Connexion de ${USER} sur $VPHOST" $DESTINATAIRE
SSHFS partage xoyaz.xyz
Secure shell file system (ou SSHFS) permet le partage d’un système de fichiers de manière sécurisée en utilisant le protocole SFTP de SSH
Le but, créer un accès réseau sur un autre serveur pour les gros volumes de fichiers (musique, livres, etc…)
Le dossier local /opt/sshfs/
sudo mkdir -p /opt/sshfs
Il faut créer une liaison réseau sécurisée entre cinay.eu ← → xoyaz.xyz
sudo apt install sshfs
Autorisations
- Autorisations “utilisateur”
- Exécuter
sshfs(ou toute autre commande de montage FUSE) avec l’option-o allow_other
- Exécuter
- Autoriser l’accès “root” des supports fuse
- Ajouter
user_allow_otherau fichier /etc/fuse.conf - Exécuter
sshfs(ou toute autre commande de montage FUSE) avec l’option-o allow_root
- Ajouter
Partage avec serveur hms.xoyaz.xyz : Clé privée hms-sto-250
Droits : chmod 600 /home/admin/.ssh/hms-sto-250
Montage manuelle pour authentifier la clé avec utilisateur “debian”
sudo -s
sshfs -o allow_other userhms@hms.xoyaz.xyz:/home/userhms/sshfs /opt/sshfs -C -p 55051 -oIdentityFile=/home/admin/.ssh/hms-sto-250
NOTE: Il faut mettre l’adresse IP du serveur , si les domaines peuvent ne pas être “résolus”
Après vérification , ls /opt/sshfs , déconnexion fusermount -u /opt/sshfs
Montage auto
Ajouter la ligne suivante au fichier /etc/fstab
userhms@hms.xoyaz.xyz:/home/userhms/sshfs /opt/sshfs fuse.sshfs _netdev,identityfile=/home/admin/.ssh/hms-sto-250,allow_other,port=55051 0 0
Montage pour authentifier la clé avec utilisateur “root”
sudo mount -a
OBSOLETE
Partage avec serveur xoyaz.xyz
Clé privée OVZ-STORAGE-128 pour accéder au serveur xoyaz.xyz
chmod 600 /home/admin/.ssh/OVZ-STORAGE-128
Exécution manuelle pour authentifier la clé avec utilisateur “debian”
sudo -s
sshfs -o allow_other usernl@xoyaz.xyz:/home/usernl/backup /opt/sshfs -C -p 55036 -oIdentityFile=/home/admin/.ssh/OVZ-STORAGE-128
The authenticity of host '[xoyaz.xyz]:55036 ([2a04:52c0:101:82::73db]:55036)' can't be established.
ECDSA key fingerprint is SHA256:NuFqR5id10fVzRLsSTqJ4vBpFnNYi+APGsvPYth6PHw.
Are you sure you want to continue connecting (yes/no)? yes
NOTE: Il faut mettre l’adresse IP du serveur , si les domaines peuvent ne pas être “résolus”
Après vérification , ls /opt/sshfs , déconnexion fusermount -u /opt/sshfs
Montage fstab
ajouter les lignes suivantes au fichier /etc/fstab
usernl@xoyaz.xyz:/home/usernl/backup /opt/sshfs fuse.sshfs _netdev,identityfile=/home/admin/.ssh/OVZ-STORAGE-128,allow_other,port=55036 0 0
Montage pour authentifier la clé avec utilisateur “root”
sudo mount -a
Domaines et DNS

Configuration DNS domaine par défaut yanfi.space
yunohost domain dns-conf yanfi.space
; Basic ipv4/ipv6 records
@ 3600 IN A 95.216.222.127
@ 3600 IN AAAA 2a01:4f9:c010:45b3::2255

; XMPP
_xmpp-client._tcp 3600 IN SRV 0 5 5222 yanfi.space.
_xmpp-server._tcp 3600 IN SRV 0 5 5269 yanfi.space.
muc 3600 IN CNAME @
pubsub 3600 IN CNAME @
vjud 3600 IN CNAME @
xmpp-upload 3600 IN CNAME @

; Mail
@ 3600 IN MX 10 yanfi.space.
@ 3600 IN TXT "v=spf1 a mx -all"
mail._domainkey 3600 IN TXT "v=DKIM1; h=sha256; k=rsa; p=MIGfMA0GCSqGSIb3DQEBAQUAA4GNADCBiQKBgQDM7ja2oZ0efNg8WWoRY82kneRiJOciFAgyBfaDpNzRQdaphq082256m6Ol9tWEqCjWakO5nmvP03s+zw53lZoUfZyY4FE58AAesHszSyvVYhCz7uSfEijD4snvIYSqkuFvRNLv2WCYPQFelx9VPl5095f+8X0Y8dx4H2TvGGqsUQIDAQAB"
_dmarc 3600 IN TXT "v=DMARC1; p=none"

; Extra
* 3600 IN A 95.216.222.127
* 3600 IN AAAA 2a01:4f9:c010:45b3::2255
@ 3600 IN CAA 128 issue "letsencrypt.org"
Se connecter à l’espace client du site OVH : Web cloud → Domaines → xoyize.xyz → Zone DNS
Cliquer sur “Modifier en mode textuel”, garder les 4 premières lignes :

puis effacer tout ce qu’il y a en-dessous, et le remplacer par la configuration donnée par votre serveur ( yunohost domain dns-conf)
Création et configuration DNS domaine yanfi.net
yunohost domain add yanfi.net
Les dns
yunohost domain dns-conf yanfi.net
; Basic ipv4/ipv6 records
@ 3600 IN A 95.216.222.127
@ 3600 IN AAAA 2a01:4f9:c010:45b3::2255

; XMPP
_xmpp-client._tcp 3600 IN SRV 0 5 5222 yanfi.net.
_xmpp-server._tcp 3600 IN SRV 0 5 5269 yanfi.net.
muc 3600 IN CNAME @
pubsub 3600 IN CNAME @
vjud 3600 IN CNAME @
xmpp-upload 3600 IN CNAME @

; Mail
@ 3600 IN MX 10 yanfi.net.
@ 3600 IN TXT "v=spf1 a mx -all"
mail._domainkey 3600 IN TXT "v=DKIM1; h=sha256; k=rsa; p=MIGfMA0GCSqGSIb3DQEBAQUAA4GNADCBiQKBgQC7jDcuICl4E9fLUhdum1TW7Pxj+pKDrn7np1nu4umYuZd7qVt69JGjtF4RvBGOASxguG1uVZLoBBYPgA8sZmmbT1Laf7g74YQm+i345yjzklT96aCJu1PvZMosvzMOBfbx6N08Nav5Rp++PTuMHFXhyDmJMr/c2/epVWm4eXbdAwIDAQAB"
_dmarc 3600 IN TXT "v=DMARC1; p=none"

; Extra
* 3600 IN A 95.216.222.127
* 3600 IN AAAA 2a01:4f9:c010:45b3::2255
@ 3600 IN CAA 128 issue "letsencrypt.org"
Création et configuration DNS domaine cinay.eu
yunohost domain add cinay.eu
Les dns
yunohost domain dns-conf cinay.eu
; Basic ipv4/ipv6 records
@ 3600 IN A 95.216.222.127
@ 3600 IN AAAA 2a01:4f9:c010:45b3::2255

; XMPP
_xmpp-client._tcp 3600 IN SRV 0 5 5222 cinay.eu.
_xmpp-server._tcp 3600 IN SRV 0 5 5269 cinay.eu.
muc 3600 IN CNAME @
pubsub 3600 IN CNAME @
vjud 3600 IN CNAME @
xmpp-upload 3600 IN CNAME @

; Mail
@ 3600 IN MX 10 cinay.eu.
@ 3600 IN TXT "v=spf1 a mx -all"
mail._domainkey 3600 IN TXT "v=DKIM1; h=sha256; k=rsa; p=MIGfMA0GCSqGSIb3DQEBAQUAA4GNADCBiQKBgQDn4KD67wSLqb4ACbBdFniSYnPkbNHAjCdah4fYFuyVkefSW5lZjmwPiZ26GJpf1gBT4/kUc5XtRdXosCDJuGsmfq0JwA7813Gmn00wNIuOGQ5WglGSvpm73iVomF/psI/+ElbA0TX0T8babIciq+jdA7g4ZhJ/zUX93oAAOoqaOQIDAQAB"
_dmarc 3600 IN TXT "v=DMARC1; p=none"

; Extra
* 3600 IN A 95.216.222.127
* 3600 IN AAAA 2a01:4f9:c010:45b3::2255
@ 3600 IN CAA 128 issue "letsencrypt.org"
Reverse DNS HETZNER VPS CX21
Se connecter en console sur l’hébergeur du VPS et dans Networking , modifier les reverses DNS
Mise à jour reverse DNS IPV4 IPV6
95.216.222.127 → yanfi.space
2a01:4f9:c010:45b3::2255 → yanfi.space
Certificats SSL

Installer un certificat Let’s Encrypt en ligne de commande
yunohost domain cert-install --no-checks # yanfi.space
yunohost domain cert-install yanfi.net --no-checks
yunohost domain cert-install cinay.eu --no-checks
Utilisateur yann
Création utilisateur yann
yunohost user create yann
First name: yann
Last name: cinayeu
E-mail address: yann@cinay.eu
You are now about to define a new user password. The password should be at least 8 characters long—though it is good practice to use a longer password (i.e. a passphrase) and/or to a variation of characters (uppercase, lowercase, digits and special characters).
Password:
Confirm password:
Success! User created
fullname: yann cinayeu
mail: yann@cinay.eu
username: yann
Historique de la ligne de commande
Ajoutez la recherche d’historique de la ligne de commande au terminal. Tapez un début de commande précédent, puis utilisez shift + up (flèche haut) pour rechercher l’historique filtré avec le début de la commande.
# Global, tout utilisateur
echo '"\e[1;2A": history-search-backward' | sudo tee -a /etc/inputrc
echo '"\e[1;2B": history-search-forward' | sudo tee -a /etc/inputrc
Script ssh_rc_bash

ATTENTION!!! Les scripts sur connexion peuvent poser des problèmes pour des appels externes autres que ssh
wget https://static.xoyaz.xyz/files/ssh_rc_bash
chmod +x ssh_rc_bash # rendre le bash exécutable
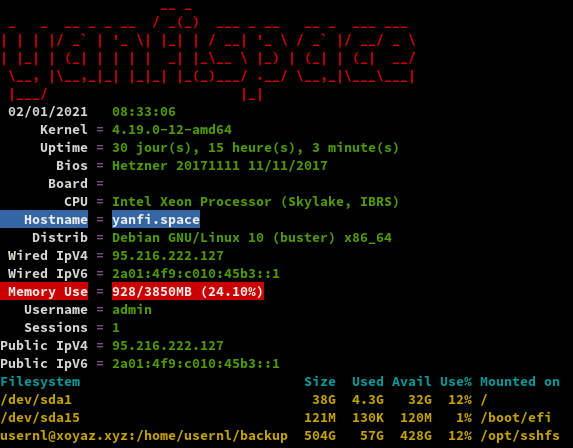
./ssh_rc_bash        # exécution
Applications
La plupart des commandes sont exécutées en mode “su”
Nextcloud (/nextcloud)

Sur le domaine cinay.eu admin, yann
yunohost app install https://github.com/YunoHost-Apps/nextcloud_ynh --debug
[...]
Choose a domain for Nextcloud (default: cinay.eu):
Choose a path for Nextcloud (default: /nextcloud):

Choose the Nextcloud administrator (must be an existing YunoHost user): yann
Access the users home folder from Nextcloud? [yes | no] (default: no): no
[...]
Dans les paramètres fichier de nextcloud , activer l’affichage des fichiers masqués
Activer les applications
Activer les applications Calendar, Contacts et Notes sur nextcloud
Paramètres de base
- Paramètres de base
- Serveur e-mail
- Personnaliser l’apparence
- Logo
- Image de connexion
Calendrier et contacts (android et thunderbird)
Paramétrage OpenSync android
Connexion avec le lien https://cinay.eu/nextcloud/remote.php/dav (login+mdp)
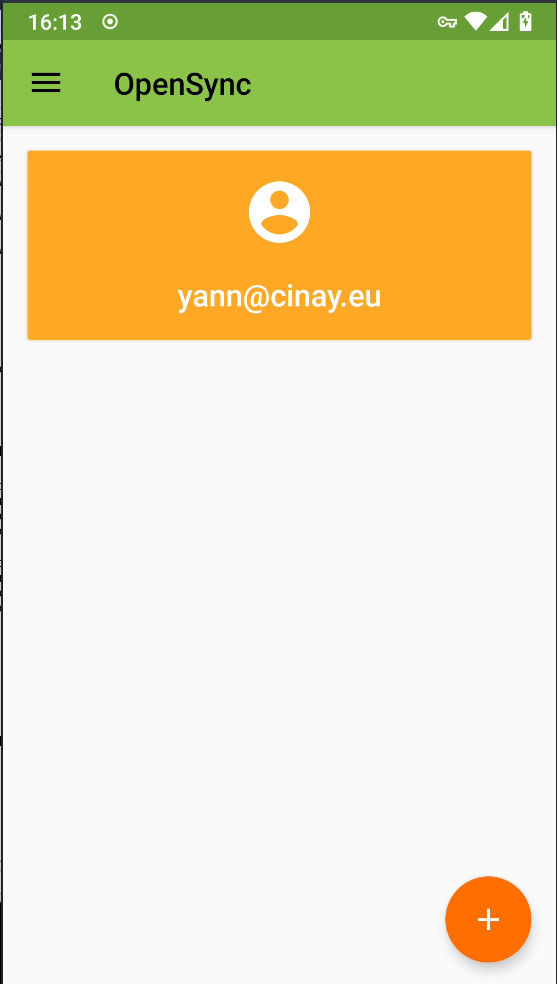

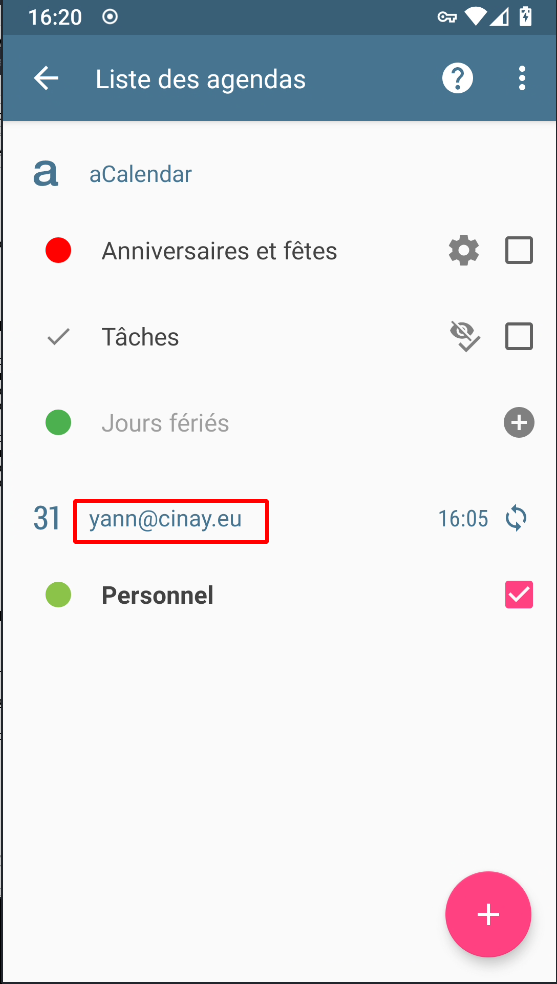
Paramétrer les applications qui utilisent le calendrier et les contacts
Contacts , acalendar et Tâches
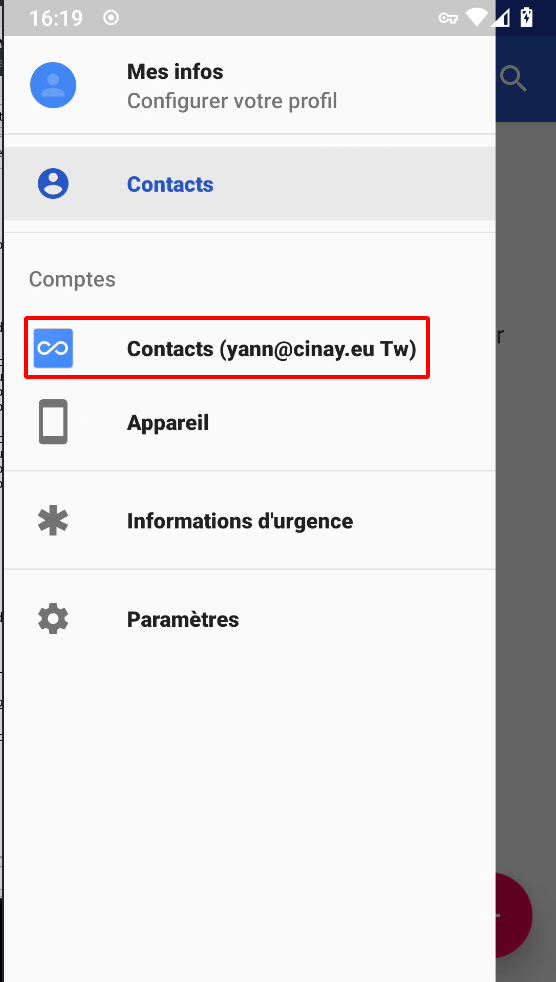

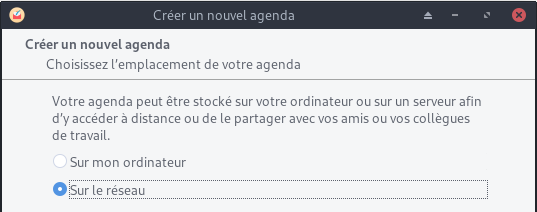
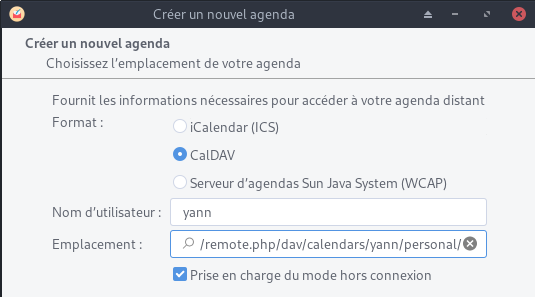
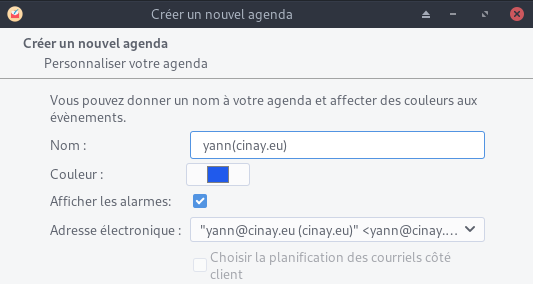
Paramétrage agenda Thunderbird


Se désabonner de l’ancien agenda cinay.xyz
Paramétrage contacts Thunderbird
Outils → Préférences des modules → TbSync
Dans l’application
Actions sur les comptes → Ajouter un nouveau compte → Caldav & Carddav

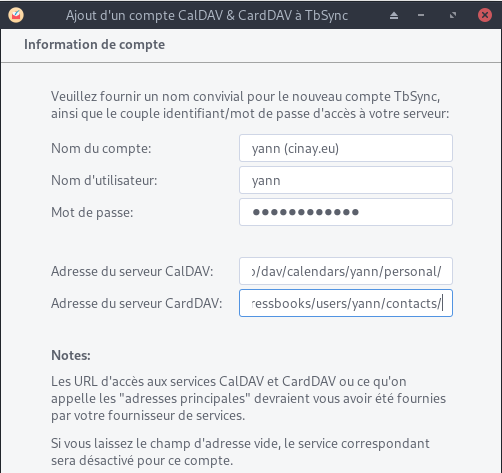
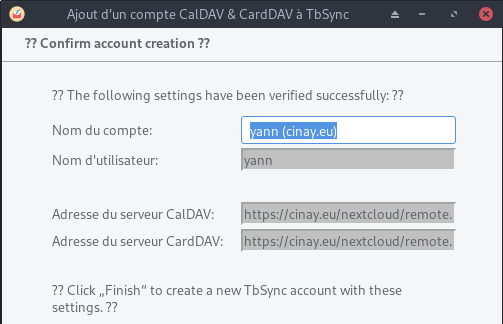
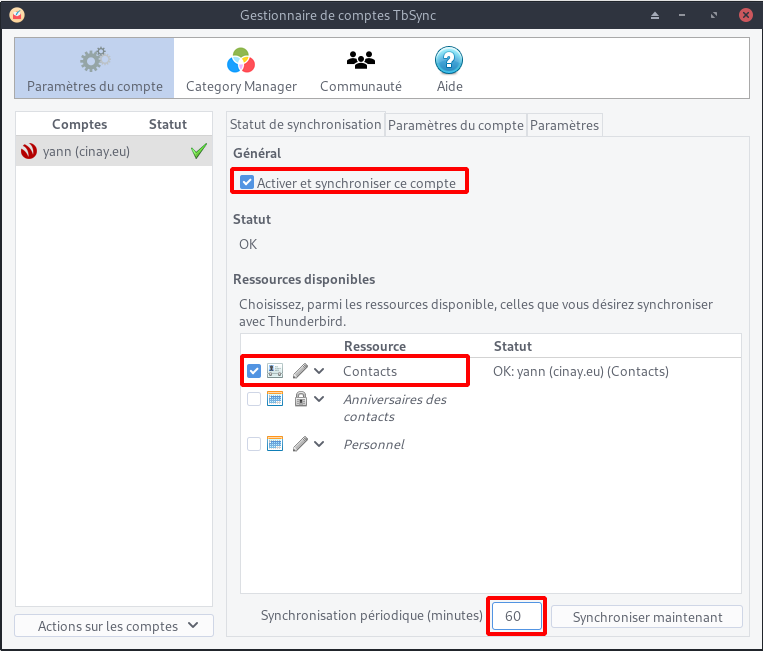
Synchronisation toutes les heures pour les contacts
Liens caldav carddav sur thunderbird (yann)
https://cinay.eu/nextcloud/remote.php/dav/calendars/yann/personal/
https://cinay.eu/nextcloud/remote.php/dav/addressbooks/users/yann/contacts/
Compte nextcloud sur les postes clients de type PC
Ajout du compte https://cinay.eu/nextcloud sur les clients nextcloud
Synchronisations:
- ~/.keepassx → Home/.keepassx (créer le dossier)
- ~/media/Notes → Notes (créer le dossier)
Compte nextcloud sur android
Application nextcloud installée
Se connecter https://cinay.eu/nextcloud et vérifier la création du compte
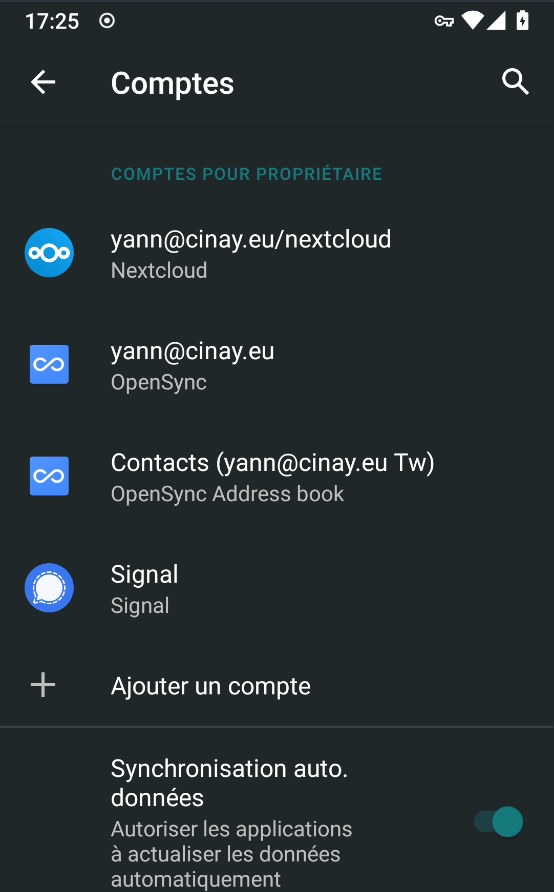
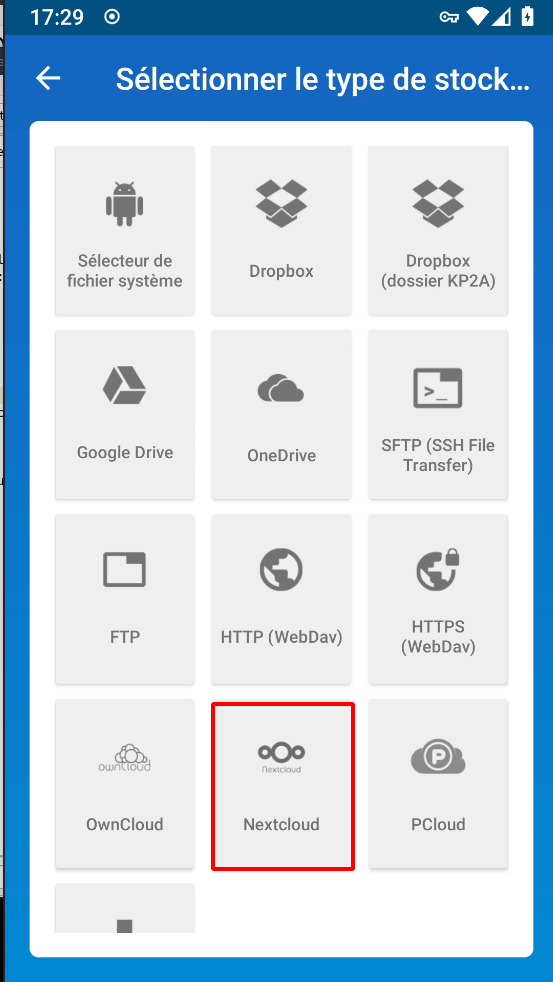
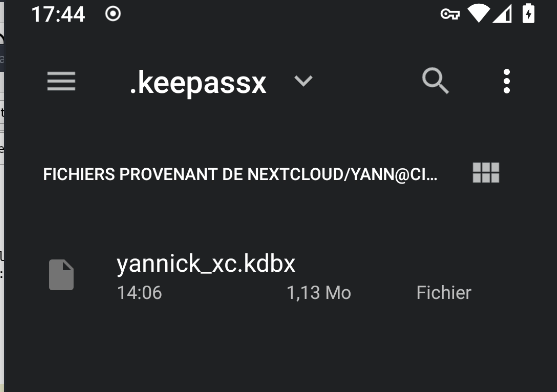
Synchroniser le fichier de mot de passe avec l’application keepass

Corriger l’avertissement « La limite de mémoire PHP est inférieure à la valeur recommandée de 512 Mo »
Augmenter la mémoire :memory_limit = 512Mdans le fichier/etc/php/7.3/fpm/php.ini
Relancersudo systemctl restart php7.3-fpm
Tiny Tiny RSS (/ttrss)

Tiny Tiny RSS (ttrss) est un agrégateur de flux RSS et Atom libre sous licence libre GNU GPL v3
Installation en mode de commande (su)
yunohost app install ttrss
Choose a domain for Tiny-Tiny-RSS (default: cinay.eu):
Choose a path for Tiny-Tiny-RSS (default: /ttrss):
Success! Installation completed
Mise à jour
yunohost app upgrade ttrss -u https://github.com/YunoHost-Apps/ttrss_ynh/tree/testing --debug
Personnaliser le CSS , configuration

Ajout du contenu suivant dans la feuille de style
body.flat.ttrss_main #headlines-frame .hl.Unread:not(.active):not(.Selected),
body.flat.ttrss_main #headlines-frame .cdm.expandable.Unread:not(.active):not(.Selected) {
  background: #696969;
}
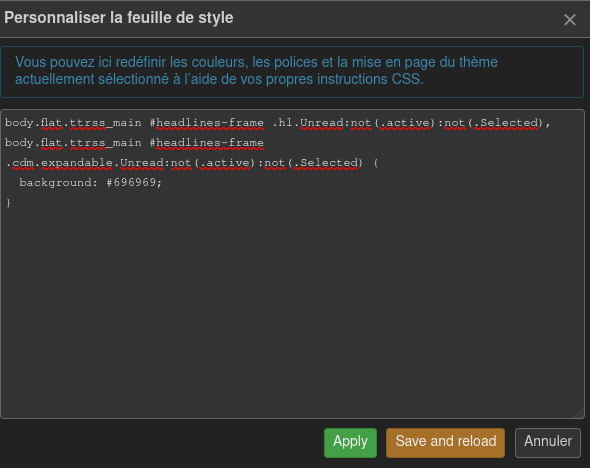
Puis cliquer Save and reload
Shaarli

Installation
yunohost app install https://github.com/YunoHost-Apps/shaarli_ynh/tree/testing
domaine : yanfi.space
racine : /shaarli
utilisateur admin : yann
Mp admin : idem mp yann
Site publique: oui
Basculer l’application de privée en publique
sed -i "s/is_public\: '0'/is_public\: '1'/g" /etc/yunohost/apps/shaarli/settings.yml
Regénérer la configuration
yunohost app ssowatconf
static.cinay.eu
En mode su
Créer le domaine static.cinay.eu et les certificats
yunohost domain add static.cinay.eu
yunohost domain cert-install static.cinay.eu --no-checks
Installer l’application Custom web app sur le domaine static.cinay.eu
yunohost app install https://github.com/YunoHost-Apps/my_webapp_ynh/tree/testing --debug
Domaine : static.cinay.eu
Racine : /
Utilisateur : yann
Create a database: no
Site publique: yes
SFTP : no + mot de passe
Accès au site https://static.cinay.eu
Le dossier /opt/sshfs/static/ contient le site statique qui est issu d’une synchronisation d’un conteneur debian sur un ordinateur archlinux avec jekyll comme générateur
rm -r /var/www/my_webapp/www/  # supprimer dossier web
chown my_webapp.my_webapp -R /var/www/my_webapp
ln -s /opt/sshfs/static /var/www/my_webapp/www  # lien et droits my_webapp
ln -s /opt/sshfs/static/htmldoc /var/www/my_webapp/www/htmldoc
Modifier l’étiquette my_webapp (static.cinay.eu)
yunohost app change-label my_webapp 'Statique static.cinay.eu'
cinay.eu/site
Accès à des liens tel que “Diceware”
Le diceware, ou méthode du lancer de dés selon l’ Office québécois de la langue française, est, en cryptologie, une méthode employée pour créer des phrases secrètes, des mots de passe et d’autres variables cryptographiques en utilisant un dé ordinaire à six faces comme générateur de nombres aléatoires physique.
Installer l’application Custom web app sans sftp sur cinay.eu/site
yunohost app install https://github.com/YunoHost-Apps/my_webapp_ynh/tree/testing --debug
Application id: my_webapp__2
rm -r /var/www/my_webapp__2/www  # supprimer dossier web
chown my_webapp__2.my_webapp__2 -R /var/www/my_webapp__2
ln -s /opt/sshfs/www /var/www/my_webapp__2/www  # lien et droits my_webapp
Modifier le fichier de configuration /etc/nginx/conf.d/cinay.eu.d/my_webapp__2.conf pour lister le contenu d’un répertoire
    # Deny access to hidden files and directories
#    location ~ ^/site/(.+/|)\.(?!well-known\/) {
#        deny all;
#    }

    fancyindex on;              # Enable fancy indexes.
    fancyindex_exact_size off;  # Output human-readable file sizes.
Redémarrer le serveur nginx
systemctl restart nginx
Modifier l’étiquette my_webapp__2
yunohost app change-label my_webapp__2 'Cartographie Diceware'
https://cinay.eu/site

Cartes - map.cinay.eu
En mode su
Créer le domaine map.cinay.eu et les certificats
yunohost domain add map.cinay.eu
yunohost domain cert-install map.cinay.eu --no-checks
Installer l’application Custom web app sur le domaine map.cinay.eu
yunohost app install https://github.com/YunoHost-Apps/my_webapp_ynh
Choose the domain where this app should be installed [cinay.eu | gitea.cinay.eu | map.cinay.eu | static.cinay.eu | yanfi.net | yanfi.space | searx.yanfi.space | zic.yanfi.space] (default: yanfi.space): map.cinay.eu
Choose the path where this app should be installed (default: /site): /
Do you need a SFTP access? [yes | no] (default: yes): no
Choose an administration password for this app:
Should this app be exposed to anonymous visitors? [yes | no] (default: yes):
Do you need a MySQL database? [yes | no] (default: no):
[...]
Info: [####################] > Installation of my_webapp__3 completed
Success! Installation completed
Accès au site https://map.cinay.eu
Le dossier /opt/sshfs/www/osm-new/ contient le site cartographique basé sur leaflet
rm -r /var/www/my_webapp__3/www/  # supprimer dossier web
chown my_webapp__3.my_webapp__3 -R /var/www/my_webapp__3
ln -s /opt/sshfs/www/osm-new /var/www/my_webapp__3/www  # lien et droits my_webapp__3
Modifier l’étiquette my_webapp__3 (map.cinay.eu)
yunohost app change-label my_webapp__3 'Cartes map.cinay.eu'
Gitea (gitea.cinay.eu)
Ajout domaine et certificats gitea.cinay.eu
yunohost domain add gitea.cinay.eu
yunohost domain cert-install gitea.cinay.eu --no-checks
Installation à partir de github, on clône le dépôt
git clone https://github.com/YunoHost-Apps/gitea_ynh.git
Blocage sur fail2ban à l’installation
Commenter la mise en place FAIL2BAN
nano gitea_ynh/scripts/install
# SETUP FAIL2BAN
#ynh_script_progression --message="Configuring fail2ban..."
#ynh_add_fail2ban_config --logpath "/var/log/$app/gitea.log" --failregex ".*Failed authentication attempt for .* from <HOST>" --max_retry 5
Installer gitea
yunohost app install gitea_ynh
Fail2ban , règle qui n’est pas ajouté
ynh_add_fail2ban_config --logpath /var/log/gitea/gitea.log --failregex '.*Failed authentication attempt for .* from <HOST>' --max_retry 5
Modifier l’étiquette gitea
yunohost app change-label gitea 'Gitea gitea.cinay.eu'
Searx (searx.yanfi.space)
Ajout domaine et certificats searx.yanfi.space
sudo yunohost domain add searx.yanfi.space
sudo yunohost domain cert-install searx.yanfi.space --no-checks
Searx - docker
Les procédures d’installation, voir le lien Searx (métamoteur de recherche libre)
L’image du docker est searx/searx (basée sur github.com/searx/searx).
cd /home/admin
docker pull searx/searx
docker images
REPOSITORY    TAG       IMAGE ID       CREATED       SIZE
searx/searx   latest    096886989dad   6 hours ago   161MB
La méthode la plus simple pour déployer un conteneur en tant que service consiste à créer le conteneur s’il n’existe pas avec un nom donné et ensuite de mapper chacune des opérations de docker (démarrage et arrêt) aux commandes de service du système.
Une fois que nous avons créé ce conteneur, nous pouvons le démarrer, l’arrêter et le redémarrer en utilisant les commandes habituelles du docker en indiquant le nom du conteneur (docker stop searx, docker start searx, docker restart searx).
Créer un nouveau fichier d’unité systemd searx.service avec la description du service dans /etc/systemd/system/.
/etc/systemd/system/searx.service
[Unit]
Description=searx container
After=docker.service
Wants=network-online.target docker.socket
Requires=docker.socket

[Service]
Restart=always
ExecStartPre=/bin/bash -c "/usr/bin/docker container inspect searx 2> /dev/null || /usr/bin/docker run --name searx --rm -d -v /home/admin/searx:/etc/searx -p 8089:8080 -e BASE_URL=http://localhost:8089/ searx/searx"
ExecStart=/usr/bin/docker start -a searx
ExecStop=/usr/bin/docker stop -t 10 searx

[Install]
WantedBy=multi-user.target
Recharger les services
sudo systemctl daemon-reload
Le fichier d’unité crée un nouveau service et associe les commandes de démarrage et d’arrêt du docker aux séquences de démarrage et d’arrêt du service.
Le fichier unit décrit comme des dépendances la cible réseau en ligne et la prise docker, si la prise docker ne démarre pas ce service ne le fera pas non plus. Il ajoute également une dépendance à docker.service, de sorte que ce service ne fonctionnera pas tant que docker.service n’aura pas démarré.
Nous pouvons maintenant démarrer/arrêter le service en émettant la commande correspondante :
sudo systemctl start searx # sudo systemctl stop searx
Vérifier localement
curl --location --verbose --head --insecure localhost:8089
[...]
*   Trying 127.0.0.1...
* TCP_NODELAY set
* Expire in 200 ms for 4 (transfer 0x5614e62aef90)
* Connected to localhost (127.0.0.1) port 8089 (#0)
> HEAD / HTTP/1.1
> Host: localhost:8089
> User-Agent: curl/7.64.0
> Accept: */*
>
< HTTP/1.1 200 OK
HTTP/1.1 200 OK
[...]
Modifier le fichier de configuration
sudo nano ${PWD}/searx/settings.yml
general:

    instance_name : "yann-searx" # displayed name

server:
    base_url : http://localhost:8089/ # Set custom base_url. Possible values: False or "https://your.custom.host/lo
cation/"

ui:
    theme_args :
        oscar_style : logicodev-dark # default style of oscar
    results_on_new_tab: True  # Open result links in a new tab by default

# supprimer la ligne 'disabled : True' des éléments ci dessous

  - name : ddg definitions
    engine : duckduckgo_definitions
    shortcut : ddd
    weight : 2

  - name : duckduckgo
    engine : duckduckgo
    shortcut : ddg

  - name : duckduckgo images
    engine : duckduckgo_images
    shortcut : ddi
    timeout: 3.0
Redémarrage pour prise en charge des modifications
sudo systemctl restart searx
Valider le service pour qu’il fonctionne au démarrage en courant :
sudo systemctl enable searx
Pour info, docker ID
docker ps
CONTAINER ID   IMAGE         COMMAND                  CREATED         STATUS         PORTS                    NAMES
dfefa57f88f9   searx/searx   "/sbin/tini -- /usr/…"   9 minutes ago   Up 9 minutes   0.0.0.0:8089->8080/tcp   searx
Redémarrer le container par son ID : docker restart dfefa57f88f9
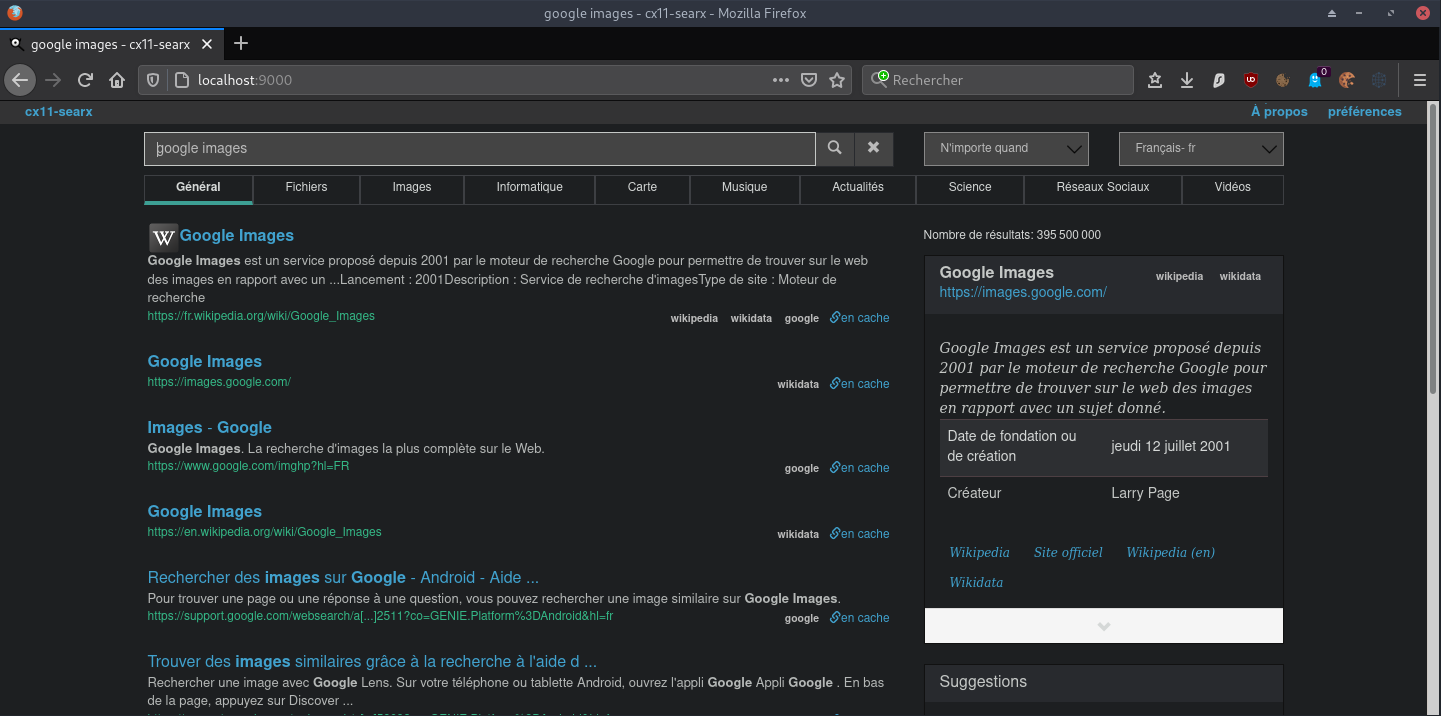
TEST à partir d’un poste distant
Exécuter sur un poste distant
ssh -L 9000:localhost:8089 cxuser@135.181.27.140 -p 55140 -i /home/yannick/.ssh/cx11_ed25519
Sur le même poste , ouvrir le navigateur avec un lien http://localhost:9000
Proxy searx
Installer application yunohost proxy redirect
sudo yunohost app install https://github.com/YunoHost-Apps/redirect_ynh
Choose a domain for your redirect (default: cinay.eu): searx.yanfi.space
Choose a path for your redirect (default: /redirect): /
Redirect destination path (default: http://127.0.0.1): http://127.0.0.1:8089
Redirect type [public_302 | public_301 | public_proxy | private_proxy] (default: public_302): public_proxy
Info: Installing redirect...
[...]
Success! Installation completed
Modifier l’étiquette redirect (searx.cinay.eu)
sudo yunohost app change-label redirect 'Moteur Recherche searx.cinay.eu'
Accès lien https://searx.yanfi.space
Mise à jour de l’image docker searx
cd /home/admin
Télécharge la dernière image searx
| docker images –format “{{.Repository}}:{{.Tag}}” | grep ‘:latest’ | xargs -L1 docker pull; |
latest: Pulling from searx/searx
339de151aab4: Pull complete
cb464254eb0a: Pull complete
3df700c30092: Pull complete
9a4946c2a738: Pull complete
2c615ec6f7fa: Pull complete
ef48a2d171a2: Pull complete
Digest: sha256:b4df2141a868644563f82680d66dc0d3c1d366f598ffc1cdb484d796c117230f
Status: Downloaded newer image for searx/searx:latest
Liste des images
docker images
REPOSITORY    TAG       IMAGE ID       CREATED        SIZE
searx/searx   latest    2b9a1d1fc86a   5 days ago     205MB
searx/searx   <none>    096886989dad   7 months ago   161MB
Arrêt image searx
sudo systemctl stop searx.service
Supprimer l’image par ID
docker rmi 096886989dad
Les images restantes
docker images
REPOSITORY    TAG       IMAGE ID       CREATED      SIZE
searx/searx   latest    2b9a1d1fc86a   5 days ago   205MB
Relancer le service
sudo systemctl start searx.service
sudo systemctl status searx.service
● searx.service - searx container
   Loaded: loaded (/etc/systemd/system/searx.service; enabled; vendor preset: enabled)
   Active: active (running) since Fri 2021-08-20 18:26:17 CEST; 17s ago
  Process: 15680 ExecStartPre=/bin/bash -c /usr/bin/docker container inspect searx 2> /dev/null || /usr/bin/docker run --name sear
 Main PID: 15788 (docker)
    Tasks: 7 (limit: 4579)
   Memory: 21.5M
   CGroup: /system.slice/searx.service
           └─15788 /usr/bin/docker start -a searx

Aug 20 18:26:16 yanfi.space systemd[1]: Starting searx container...
Aug 20 18:26:16 yanfi.space bash[15680]: []
Aug 20 18:26:16 yanfi.space bash[15680]: 6a7551c7a9fbbdc86e234aa07dbadde13ecd2878cef7beea49272b9de2a0b313
Aug 20 18:26:17 yanfi.space systemd[1]: Started searx container.
Aug 20 18:26:17 yanfi.space docker[15788]: searx version 1.0.0-200-313a9847
Aug 20 18:26:17 yanfi.space docker[15788]: Use existing /etc/searx/uwsgi.ini
Aug 20 18:26:17 yanfi.space docker[15788]: Use existing /etc/searx/settings.yml
Aug 20 18:26:17 yanfi.space docker[15788]: Listen on 0.0.0.0:8080
Aug 20 18:26:17 yanfi.space docker[15788]: [uWSGI] getting INI configuration from /etc/searx/uwsgi.ini
Aug 20 18:26:17 yanfi.space docker[15788]: [uwsgi-static] added mapping for /static => /usr/local/searx/searx/static
Navidrome (stream audio)
Navidrome est un serveur et un streamer de collection de musique en ligne open source. Il vous donne la liberté d’écouter votre playlist à partir de n’importe quel navigateur ou appareil mobile.
Votre musique est a stockée par default dans le dossier multimédia partagé /home/yunohost.multimedia/share/Music. Ce dossier, facilement accessible depuis Nextcloud avec Stockages externes activée, vous permettra d’uploader facilement vos fichiers de musique sur votre server.
Vous pouvez personnaliser le dossier de stockage de vos fichiers de musique en éditant le fichier de configuration /var/lib/navidrome/navidrome.toml et rediriger la variable MusicFolder = "/home/yunohost.multimedia/share/Music". Vous pouvez également changer d’autre réglage en vous aidant de la documentation.
En mode su
Ajout domaine et certificats zic.yanfi.space
yunohost domain add zic.yanfi.space
yunohost domain cert-install zic.yanfi.space --no-checks
Installer navidrome
yunohost app install https://github.com/YunoHost-Apps/navidrome_ynh/tree/testing --debug
domaine : zic.yanfi.space
racine : /
anonyme : oui
Modification fichier de configuration, dossier musique et scan
nano /var/lib/navidrome/navidrome.toml
# Folder where your music library is stored. Can be read-only
MusicFolder = "/opt/sshfs/musique"

# How frequently to scan for changes in your music library. Set it to 0 to disable scans
ScanSchedule = '@every 24h'
Redémarrer le service
systemctl restart navidrome.service
Modifier l’étiquette navidrome
yunohost app change-label navidrome 'Zic Navidrome zic.cinay.eu'
Rainloop

En mode su
yunohost app install rainloop
Choose the domain where this app should be installed [cinay.eu | gitea.cinay.eu | static.cinay.eu | yanfi.net | yanfi.space | searx.yanfi.space | zic.yanfi.space] (default: yanfi.space):
Choose the path where this app should be installed (default: /rainloop):
Should this app be exposed to anonymous visitors? [yes | no] (default: no):
Choose an administration password for this app:
Do you want to add YunoHost users to the recipients suggestions? [yes | no] (default: yes):
Select default language [de | en | es | fr | it | pt] (default: en): fr
[...]
Info: [####################] > Installation of rainloop completed
Success! Installation completed
LibreSpeed
![]()
Test de vitesse de connexion très léger.LibreSpeed
domaine : yanfi.space
site : /librespeed
En mode su
yunohost app install librespeed # un mot de passe administartion est demandé
Le fichier de configuration nginx
/etc/nginx/conf.d/yanfi.space.d/librespeed.conf
 rewrite ^/librespeed$ /librespeed/ permanent;
location /librespeed/ {

  # Path to source
  alias /var/www/librespeed/ ;

  # Force usage of https
  if ($scheme = http) {
    rewrite ^ https://$server_name$request_uri? permanent;
  }

### Example PHP configuration (remove it if not used)
  index yann-singleServer-full.html index.php;

  # Common parameter to increase upload size limit in conjunction with dedicated php-fpm file
  client_max_body_size 256M;

  try_files $uri $uri/ /index.php;
  location ~ [^/]\.php(/|$) {
    fastcgi_split_path_info ^(.+?\.php)(/.*)$;
    fastcgi_pass unix:/var/run/php/php7.3-fpm-librespeed.sock;
    fastcgi_index index.php;
    include fastcgi_params;
    fastcgi_param REMOTE_USER $remote_user;
    fastcgi_param PATH_INFO $fastcgi_path_info;
    fastcgi_param SCRIPT_FILENAME $request_filename;
  }
### End of PHP configuration part

  # Include SSOWAT user panel.
  include conf.d/yunohost_panel.conf.inc;
}
Le fichier original example-singleServer-full.html a été remplacé par yann-singleServer-full.html
https://yanfi.space/librespeed
Calibre ebook.yanfi.space
Source : https://github.com/janeczku/calibre-web
Caractéristiques
- Interface HTML5 Bootstrap 3
- configuration graphique complète
- Gestion des utilisateurs avec des permissions par utilisateur à grain fin
- Interface administrateur
- Interface utilisateur en brésilien, tchèque, néerlandais, anglais, finnois, français, allemand, grec, hongrois, italien, japonais, khmer, polonais, russe, chinois simplifié, espagnol, suédois, turc, ukrainien.
- Flux OPDS pour les applications de lecture de livres électroniques
- Filtrez et recherchez par titres, auteurs, tags, séries et langues.
- Créer une collection de livres personnalisée (étagères)
- Prise en charge de l’édition des métadonnées des livres électroniques et de la suppression des livres électroniques de la bibliothèque Calibre.
- Prise en charge de la conversion des eBooks par les binaires Calibre
- Restriction du téléchargement des livres électroniques aux utilisateurs connectés
- Support pour l’enregistrement public des utilisateurs
- Envoi d’eBooks vers des appareils Kindle d’un simple clic de souris
- Synchronisation de vos appareils Kobo avec votre bibliothèque Calibre via Calibre-Web
- Prise en charge de la lecture des eBooks directement dans le navigateur (.txt, .epub, .pdf, .cbr, .cbt, .cbz, .djvu)
- Téléchargement de nouveaux livres dans de nombreux formats, y compris les formats audio (.mp3, .m4a, .m4b)
- Prise en charge des colonnes personnalisées de Calibre
- Possibilité de masquer le contenu en fonction des catégories et du contenu des colonnes personnalisées par utilisateur.
- Possibilité de mise à jour automatique
- Connexion “Magic Link” pour faciliter la connexion aux eReaders
- Connexion via LDAP, google/github oauth et via l’authentification proxy.
Ajout domaine et certificats ebook.yanfi.space
yunohost domain add ebook.yanfi.space
yunohost domain cert-install ebook.yanfi.space --no-checks
Installer l’application Calibre-web
yunohost app install https://github.com/YunoHost-Apps/calibreweb_ynh
Choose the domain where this app should be installed [cinay.eu | gitea.cinay.eu | map.cinay.eu | static.cinay.eu | yanfi.net | yanfi.space | ebook.yanfi.space | searx.yanfi.space | zic.yanfi.space] (default: yanfi.space): ebook.yanfi.space
Choose the path where this app should be installed (default: /calibre): /
Choose an administrator user for this app [yann | claudine | yanfi]: yann
Should this app be exposed to anonymous visitors? [yes | no] (default: no): yes
Select a default language [fr | en | es | de] (default: fr):
Do you want to allow uploading of books? [yes | no] (default: no):
Do you want to allow access to the library to all Yunohost users?  [yes | no] (default: yes):
Le dossier des livres est une copie d’un dossier distant qui est mis à jour une fois par jour
Synchronisation du dossier local /home/yunohost.multimedia/share/eBook/ avec le dossier distant /home/usernl/backup/BiblioCalibre du serveur xoyaz.xyz
L’opération est exécutable en mode su seulement
rsync -avz --delete --rsync-path="sudo rsync" -e "ssh -p 55051 -i /home/admin/.ssh/hms-sto-250 -o StrictHostKeyChecking=no -o UserKnownHostsFile=/dev/null" userhms@hms.xoyaz.xyz:/home/userhms/sshfs/BiblioCalibre/* /home/yunohost.multimedia/share/eBook/  && chown calibreweb.calibreweb -R /home/yunohost.multimedia/share/eBook/

Créer une tâche crontab

sudo crontab -e
# Synchronisation du dossier local /home/yunohost.multimedia/share/eBook/ avec le dossier distant /home/userhms/sshfs/BiblioCalibre du serveur hms.xoyaz.xyz
# Tous les jours à 4h00 du matin
0 4 * * * rsync -avz --delete --rsync-path="sudo rsync" -e "ssh -p 55051 -i /home/admin/.ssh/hms-sto-250 -o StrictHostKeyChecking=no -o UserKnownHostsFile=/dev/null" userhms@hms.xoyaz.xyz:/home/userhms/sshfs/BiblioCalibre/* /home/yunohost.multimedia/share/eBook/  && chown calibreweb.calibreweb -R /home/yunohost.multimedia/share/eBook/
A FAIRE : En cas de modification du dossier /home/userhms/sshfs/BiblioCalibre sur le serveur hms.xoyaz.xyz
Il faut effectuer une synchro du dossier par rsync depuis le serveur hms.xoyaz.xyz vers yanfi.space
Les traductions de l’application “calibreweb_ynh”
find /var/www/calibreweb/cps/templates/ -name "*.*" -type f -exec sed -i "s#'Sort according to book date, newest first'#'Trier selon la date du livre, le plus récent en premier'#g" {} \;
find /var/www/calibreweb/cps/templates/ -name "*.*" -type f -exec sed -i "s#'Sort according to book date, oldest first'#'Trier selon la date du livre, le plus ancien en premier'#g" {} \;
find /var/www/calibreweb/cps/templates/ -name "*.*" -type f -exec sed -i "s#'Sort title in alphabetical order'#'Trier le titre par ordre alphabétique'#g" {} \;
find /var/www/calibreweb/cps/templates/ -name "*.*" -type f -exec sed -i "s#'Sort title in reverse alphabetical order'#'Trier le titre en ordre alphabétique inverse'#g" {} \;
find /var/www/calibreweb/cps/templates/ -name "*.*" -type f -exec sed -i "s#'Sort authors in alphabetical order'#'Trier les auteurs par ordre alphabétique'#g" {} \;
find /var/www/calibreweb/cps/templates/ -name "*.*" -type f -exec sed -i "s#'Sort authors in reverse alphabetical order'#'Trier les auteurs par ordre alphabétique inverse'#g" {} \;
find /var/www/calibreweb/cps/templates/ -name "*.*" -type f -exec sed -i "s#'Sort according to publishing date, newest first'#'Trier selon la date de publication, les plus récentes en premier'#g" {} \;
find /var/www/calibreweb/cps/templates/ -name "*.*" -type f -exec sed -i "s#'Sort according to publishing date, oldest first'#'Trier selon la date de publication, la plus ancienne en premier'#g" {} \;
Les fichiers de traduction française dans le dossier /var/www/calibreweb/cps/translations/fr/LC_MESSAGES/
Editer et modifier le fichier messages.po
Convertir le po vers mo , lien http://po2mo.net/
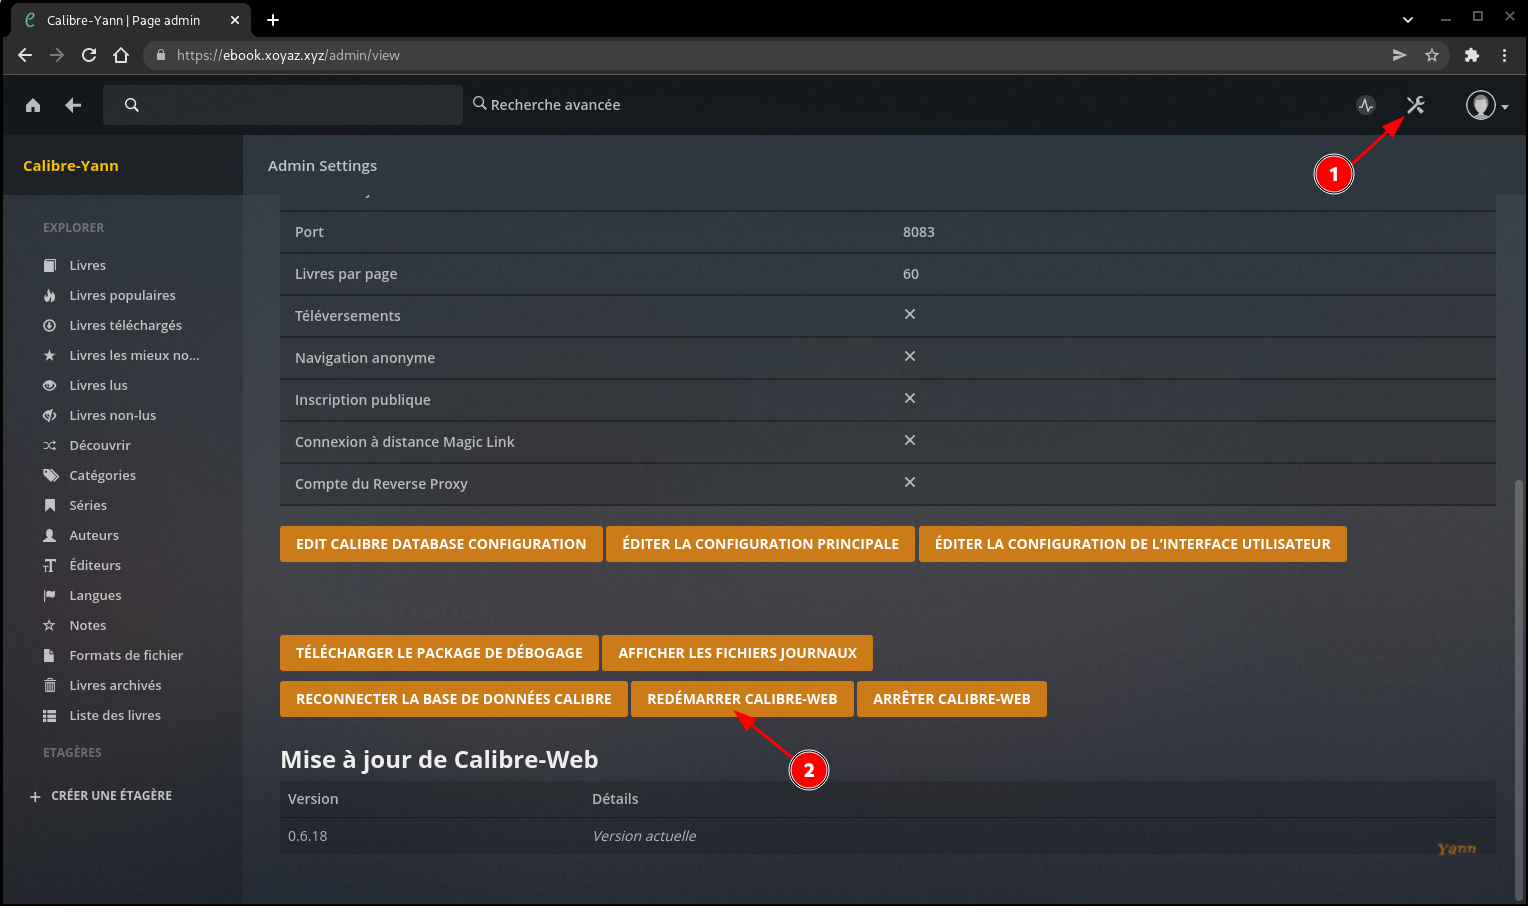
Redémarrer le service calibreweb
systemctl restart calibreweb
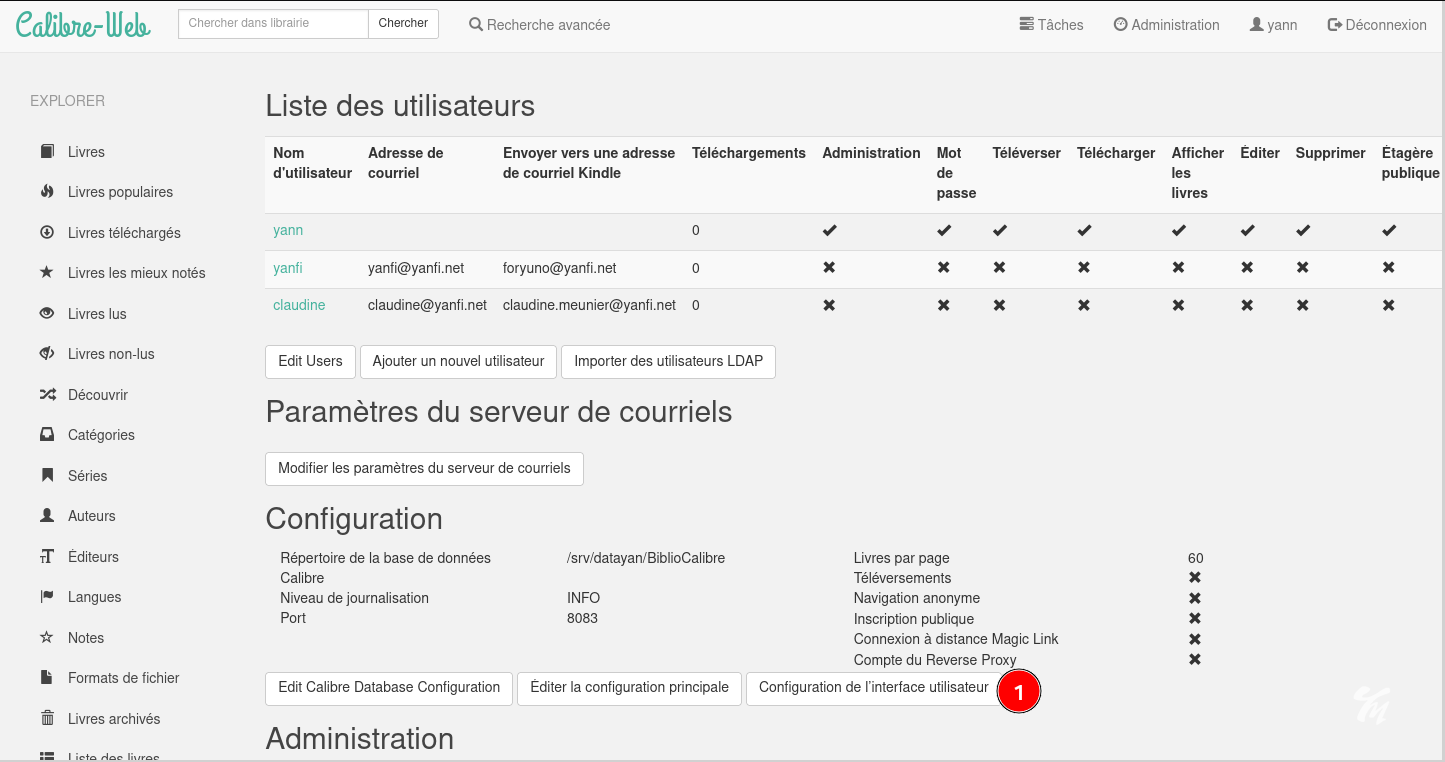
Ouverture du lien https://ebook.yanfi.space




Sauvegardes
BorgBackup
Via rsync
Sauvegarde complète de yunohost yanfi.space sur le serveur hms.xoyaz.xyz via rsync
est désactivée depuis la mise en place de la sauvegarde par BorgBackup
Créer le bash ~/backup-hms.xoyaz.xyz.sh
nano ~/backup-hms.xoyaz.xyz.sh
#!/bin/sh
# Créer une sauvegarde totale localement
yunohost backup create --debug
# Copier cette sauvegarde sur le distant hms.xoyaz.xyz
rsync -avz --progress --stats --human-readable --rsync-path="sudo rsync" -e "ssh -p 55051 -i /home/admin/.ssh/hms-sto-250 -o StrictHostKeyChecking=no -o UserKnownHostsFile=/dev/null" /home/yunohost.backup/archives/$(date '+%Y%m%d')* userhms@hms.xoyaz.xyz:/home/userhms/sshfs/yanfi.space/ ; \
 if [ $? -eq 0 ]; then \
 echo "Sauvegardes $(date '+%Y%m%d')* -> OK" | systemd-cat -t allsync -p info ; \
 rm /home/yunohost.backup/archives/$(date '+%Y%m%d')* ; \
 else \
 echo "Sauvegardes $(date '+%Y%m%d')* -> ERREUR" | systemd-cat -t allsync -p emerg ; \
 fi
Le rendre exécutable
chmod +x ~/backup-hms.xoyaz.xyz.sh
Le résultat de la commande est dans le journal
journalctl --no-pager -t allsync --since today
-- Logs begin at Wed 2021-09-15 11:48:08 CEST, end at Wed 2021-09-15 18:47:50 CEST. --
Sep 15 18:24:45 yanfi.space allsync[16720]: Sauvegardes 20210915* -> OK
Tâche
sudo crontab -e
10 02 * * * /home/admin/backup-hms.xoyaz.xyz.sh > /dev/null
Yunohost +
Maintenance
sauvegardes borg sur le serveur xoyaz.yz
Clé SSH pour lister les sauvegardes borg sur le serveur xoyaz.yz
ssh-keygen -t ed25519 -f ~/.ssh/borg_yanfi
Se connecter au serveur xoyaz.xyz et ajouter la clé publique
ssh userhms@45.145.166.51 -p 55051 -i /home/yann/.ssh/hms-sto-250
sudo -u borgbackup -s # utilisateur borgbackup
echo 'ssh-ed25519 AAAAkjhreszFJE5AAAAIBWaYu5BvBcpuTeP4/0QXLm3/vmKP7EagcWXi+MGygJ7 yann@archyan' >> /home/backup/.ssh/authorized_keys
Test connexion SSH
ssh borgbackup@xoyaz.xyz -p 55051 -i /home/yann/.ssh/borg_yanfi
Erreurs et avertissements
yanfi.space
Mise à jour reverse DNS IPV4 IPV6
95.216.222.127 → yanfi.space
2a01:4f9:c010:45b3::2255 → yanfi.space
Mise à jour yunohost 02/02/2021
yunohost diagnosis run --force
Le détail
yunohost diagnosis show --issues
reports:
  0:
    description: Base system
    id: basesystem
    items:
      status: WARNING
      summary: It looks like apt (the package manager) is configured to use the backports repository. Unless you really know what you are doing, we strongly discourage from installing packages from backports, because it's likely to create unstabilities or conflicts on your system.
  1:
    description: Email
    id: mail
    items:
      0:
        details:
          - The blacklist reason is: "http://www.barracudanetworks.com/reputation/?pr=1&ip=95.216.222.127"
          - After identifying why you are listed and fixed it, feel free to ask for your IP or domaine to be removed on https://barracudacentral.org/rbl/
        status: ERROR
        summary: Your IP or domain 95.216.222.127 is blacklisted on Barracuda Reputation Block List
      1:
        details:
          - The blacklist reason is: "https://matrix.spfbl.net/2a01:4f9:c010:45b3:0:0:0:1"
          - After identifying why you are listed and fixed it, feel free to ask for your IP or domaine to be removed on https://spfbl.net/en/dnsbl/
        status: ERROR
        summary: Your IP or domain 2a01:4f9:c010:45b3::2255 is blacklisted on SPFBL.net RBL
  2:
    description: System configurations
    id: regenconf
    items:
      details: This is probably OK if you know what you're doing! YunoHost will stop updating this file automatically... But beware that YunoHost upgrades could contain important recommended changes. If you want to, you can inspect the differences with 'yunohost tools regen-conf ssh --dry-run --with-diff' and force the reset to the recommended configuration with 'yunohost tools regen-conf ssh --force'
      status: WARNING
      summary: Configuration file /etc/ssh/sshd_config appears to have been manually modified.
Résoudre le blocage barracuda
          - The blacklist reason is: "http://www.barracudanetworks.com/reputation/?pr=1&ip=95.216.222.127"
          - After identifying why you are listed and fixed it, feel free to ask for your IP or domaine to be removed on https://barracudacentral.org/rbl/
        status: ERROR
        summary: Your IP or domain 95.216.222.127 is blacklisted on Barracuda Reputation Block List
Lien https://barracudacentral.org/rbl/removal-request , il faut renseigner l’adresse ip 95.216.222.127 et un mail
Traduction du résultat:
Demande reçue

Merci d'avoir soumis votre demande. S'il s'agit de votre première demande, la réputation de votre adresse IP sera portée à "normale" pendant 48 heures, le temps que nous menions notre enquête. Il peut s'écouler jusqu'à une heure avant que la réputation ne se propage à tous les pare-feu antispam Barracuda dans le monde. Nous vous remercions de votre patience et vous prions de nous excuser pour tout désagrément.

Votre numéro de confirmation est BBR21612284433-86752-13901.

EmailReg.org

Une façon d'éviter que votre courrier électronique soit bloqué par inadvertance est d'enregistrer votre domaine et vos adresses IP sur EmailReg.org. Les courriels provenant de noms de domaine et d'adresses IP correctement enregistrés sur EmailReg.org peuvent être automatiquement exemptés des couches de défense du filtrage du spam sur les pare-feu antispam Barracuda et d'autres solutions antispam, ce qui permet d'éviter que votre courriel soit accidentellement bloqué.
Résoudre le blocage
          - The blacklist reason is: "https://matrix.spfbl.net/2a01:4f9:c010:45b3:0:0:0:1"
          - After identifying why you are listed and fixed it, feel free to ask for your IP or domaine to be removed on https://spfbl.net/en/dnsbl/
        status: ERROR
        summary: Your IP or domain 2a01:4f9:c010:45b3::2255 is blacklisted on SPFBL.net RBL
Vérifier rDNS
[yann@archyan ~]$ dig ptr 127.222.216.95.in-addr.arpa +noall +answer
127.222.216.95.in-addr.arpa. 86400 IN	PTR	yanfi.space.
[yann@archyan ~]$ dig PTR 1.0.0.0.0.0.0.0.0.0.0.0.0.0.0.0.3.b.5.4.0.1.0.c.9.f.4.0.1.0.a.2.ip6.arpa +noall +answer
1.0.0.0.0.0.0.0.0.0.0.0.0.0.0.0.3.b.5.4.0.1.0.c.9.f.4.0.1.0.a.2.ip6.arpa. 86400	IN PTR yanfi.space.
Thème “yann”
A partir d’un thème existant : cp -r /usr/share/ssowat/portal/assets/themes/{light,yann}
Les images : /usr/share/ssowat/portal/assets/img/
Image de fond : iceland-aurore-polaire.jpg
Logo : ym-70x70.png , yannick-white16x16.png
Le fichier css : /usr/share/ssowat/portal/assets/themes/yann/custom_portal.css
Modifier la balise body {
/*
===============================================================================
 This file contain extra CSS rules to customize the YunoHost user portal and
 can be used to customize app tiles, buttons, etc...
===============================================================================
*/
body {
  margin:0;
  padding:0;
  background: url("../../img/iceland-aurore-polaire.jpg") no-repeat center fixed;
  -webkit-background-size: cover; /* pour anciens Chrome et Safari */
  background-size: cover; /* version standardisée */
}
Personnaliser le logo
Modifier le fichier /usr/share/ssowat/portal/assets/themes/yann/custom_portal.css
/* Logo */
.ynh-logo {
  opacity: 0.7;
  margin-top: 6em;
  width: 100%;
  height: 9em;
  background-image: url("../../img/ym-70x70.png");
  background-repeat: no-repeat;
  background-position: center 100%;
  background-size: contain;
}

.user-container:before {
  content: url("../../img/yannick-white64x64.png");
  background: #0000;
}
Modifier le fichier /usr/share/ssowat/portal/assets/themes/yann/custom_overlay.css
#ynh-overlay-switch {
  /* FIXME : idk if this is an issue or not to have /yunohost/sso hard-coded here */
  background-image: url("/yunohost/sso/assets/img/ym-70x70.png");
  right: 60px;
  border-color: #7EA93D;
  background-color: #7EA93D;
}
Activer le thème nano /etc/ssowat/conf.json.persistent
{
    "theme" : "yann",
}
!!! Rrafraîchir le cache du navigateur pour que le thème se propage complètement ( Ctrl+Maj+R sur Firefox)

Mise à jour
system et app
En mode su
yunohost tools update
# si mise à jour possible
yunohost tools upgrade apps
yunohost tools upgrade system
AIDE
YunoHost update

positional arguments:
  TARGET      What to update, "apps" (application catalog) or "system" (fetch
              available package upgrades, equivalent to apt update), "all" for
              both

optional arguments:
  -h, --help  show this help message and exit
  --apps      (Deprecated, see first positional arg) Fetch the application
              list to check which apps can be upgraded
  --system    (Deprecated, see first positional arg) Fetch available system
              packages upgrades (equivalent to apt update)
root@yanfi:/home/admin# yunohost tools upgrade -h
usage: yunohost tools upgrade [{apps,system}] [-h] [--apps] [--system]

YunoHost upgrade

positional arguments:
  {apps,system}  What to upgrade, either "apps" (all apps) or "system" (all
                 system packages)

optional arguments:
  -h, --help     show this help message and exit
  --apps         (Deprecated, see first positional arg) Upgrade all
                 applications
  --system       (Deprecated, see first positional arg) Upgrade only the
                 system packages
Navidrome
Mise à jour Navidrome avec une version compilée (langue FR par défaut)
Mise à jour (version compilée avec langue française par défaut et transmise par filezilla)
sudo systemctl stop navidrome.service
sudo cp ~/navidrome /opt/yunohost/navidrome/navidrome
sudo chown -R navidrome:navidrome /opt/yunohost/navidrome
sudo chmod +x /opt/yunohost/navidrome
Relance et vérification
sudo systemctl restart navidrome
sudo yunohost service log navidrome
NE PAS FAIRE MAJ Navidrome
Il faut renseigner le fichier manifest.json avec la version update pour ne pas faire la mise à jour !!!
EXEMPLE : yunohost tools update
[...]
apps:
  0:
    current_version: 0.42.1~ynh1
    id: navidrome
    label: Zic Navidrome zic.cinay.eu
    new_version: 0.42.1~ynh2
Modifier la version dans le fichier manifest.json de l’application Navidrome
sed -i 's/0.42.1~ynh1/0.42.1~ynh2/g' /etc/yunohost/apps/navidrome/manifest.json


